---
title: "LangGraph"
description: "import Tabs from '@theme/Tabs'; import TabItem from '@theme/TabItem';"
type: skill
canonical_url: https://claudary.paisolsolutions.com/skills/langgraph
source: "Claudary"
difficulty: intermediate
author: "Claude Code Knowledge Pack"
date: 2026-07-10T11:30:29.233Z
license: CC-BY-4.0
attribution: "LangGraph — Claudary (https://claudary.paisolsolutions.com/skills/langgraph)"
---
# LangGraph
import Tabs from '@theme/Tabs'; import TabItem from '@theme/TabItem';
## Overview
import Tabs from '@theme/Tabs';
import TabItem from '@theme/TabItem';
# LangGraph
Call LangGraph agents through LiteLLM using the OpenAI chat completions format.
| Property | Details |
|----------|---------|
| Description | LangGraph is a framework for building stateful, multi-actor applications with LLMs. LiteLLM supports calling LangGraph agents via their streaming and non-streaming endpoints. |
| Provider Route on LiteLLM | `langgraph/{agent_id}` |
| Provider Doc | [LangGraph Platform ↗](https://langchain-ai.github.io/langgraph/cloud/quick_start/) |
**Prerequisites:** You need a running LangGraph server. See [Setting Up a Local LangGraph Server](#setting-up-a-local-langgraph-server) below.
## Quick Start
### Model Format
```shell showLineNumbers title="Model Format"
langgraph/{agent_id}
```
**Example:**
- `langgraph/agent` - calls the default agent
### LiteLLM Python SDK
```python showLineNumbers title="Basic LangGraph Completion"
import litellm
response = litellm.completion(
model="langgraph/agent",
messages=[
{"role": "user", "content": "What is 25 * 4?"}
],
api_base="http://localhost:2024",
)
print(response.choices[0].message.content)
```
```python showLineNumbers title="Streaming LangGraph Response"
import litellm
response = litellm.completion(
model="langgraph/agent",
messages=[
{"role": "user", "content": "What is the weather in Tokyo?"}
],
api_base="http://localhost:2024",
stream=True,
)
for chunk in response:
if chunk.choices[0].delta.content:
print(chunk.choices[0].delta.content, end="")
```
### LiteLLM Proxy
#### 1. Configure your model in config.yaml
```yaml showLineNumbers title="LiteLLM Proxy Configuration"
model_list:
- model_name: langgraph-agent
litellm_params:
model: langgraph/agent
api_base: http://localhost:2024
```
#### 2. Start the LiteLLM Proxy
```bash showLineNumbers title="Start LiteLLM Proxy"
litellm --config config.yaml
```
#### 3. Make requests to your LangGraph agent
```bash showLineNumbers title="Basic Request"
curl http://localhost:4000/v1/chat/completions \\
-H "Content-Type: application/json" \\
-H "Authorization: Bearer $LITELLM_API_KEY" \\
-d '{
"model": "langgraph-agent",
"messages": [
{"role": "user", "content": "What is 25 * 4?"}
]
}'
```
```bash showLineNumbers title="Streaming Request"
curl http://localhost:4000/v1/chat/completions \\
-H "Content-Type: application/json" \\
-H "Authorization: Bearer $LITELLM_API_KEY" \\
-d '{
"model": "langgraph-agent",
"messages": [
{"role": "user", "content": "What is the weather in Tokyo?"}
],
"stream": true
}'
```
```python showLineNumbers title="Using OpenAI SDK with LiteLLM Proxy"
from openai import OpenAI
client = OpenAI(
base_url="http://localhost:4000",
api_key="your-litellm-api-key"
)
response = client.chat.completions.create(
model="langgraph-agent",
messages=[
{"role": "user", "content": "What is 25 * 4?"}
]
)
print(response.choices[0].message.content)
```
```python showLineNumbers title="Streaming with OpenAI SDK"
from openai import OpenAI
client = OpenAI(
base_url="http://localhost:4000",
api_key="your-litellm-api-key"
)
stream = client.chat.completions.create(
model="langgraph-agent",
messages=[
{"role": "user", "content": "What is the weather in Tokyo?"}
],
stream=True
)
for chunk in stream:
if chunk.choices[0].delta.content is not None:
print(chunk.choices[0].delta.content, end="")
```
## Environment Variables
| Variable | Description |
|----------|-------------|
| `LANGGRAPH_API_BASE` | Base URL of your LangGraph server (default: `http://localhost:2024`) |
| `LANGGRAPH_API_KEY` | Optional API key for authentication |
## Supported Parameters
| Parameter | Type | Description |
|-----------|------|-------------|
| `model` | string | The agent ID in format `langgraph/{agent_id}` |
| `messages` | array | Chat messages in OpenAI format |
| `stream` | boolean | Enable streaming responses |
| `api_base` | string | LangGraph server URL |
| `api_key` | string | Optional API key |
## Setting Up a Local LangGraph Server
Before using LiteLLM with LangGraph, you need a running LangGraph server.
### Prerequisites
- Python 3.11+
- An LLM API key (OpenAI or Google Gemini)
### 1. Install the LangGraph CLI
```bash
uv add "langgraph-cli[inmem]"
```
### 2. Create a new LangGraph project
```bash
langgraph new my-agent --template new-langgraph-project-python
cd my-agent
```
### 3. Install dependencies
```bash
uv add -e .
```
### 4. Set your API key
```bash
echo "OPENAI_API_KEY=your_key_here" > .env
```
### 5. Start the server
```bash
langgraph dev
```
The server will start at `http://localhost:2024`.
### Verify the server is running
```bash
curl -s --request POST \\
--url "http://localhost:2024/runs/wait" \\
--header 'Content-Type: application/json' \\
--data '{
"assistant_id": "agent",
"input": {
"messages": [{"role": "human", "content": "Hello!"}]
}
}'
```
## LiteLLM A2A Gateway
You can also connect to LangGraph agents through LiteLLM's A2A (Agent-to-Agent) Gateway UI. This provides a visual way to register and test agents without writing code.
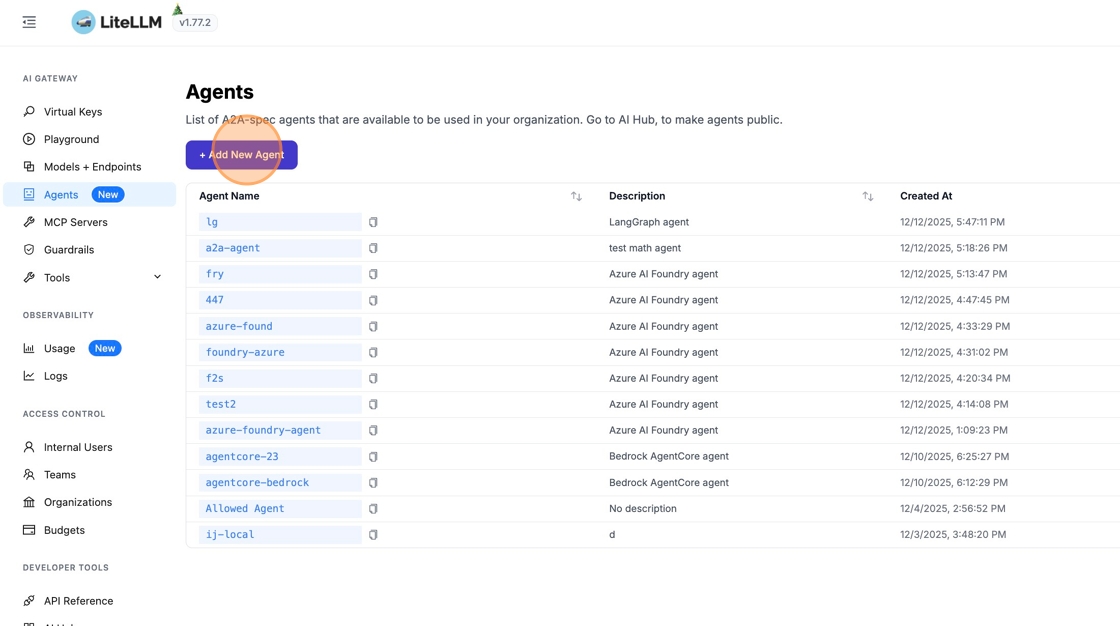
### 1. Navigate to Agents
From the sidebar, click "Agents" to open the agent management page, then click "+ Add New Agent".
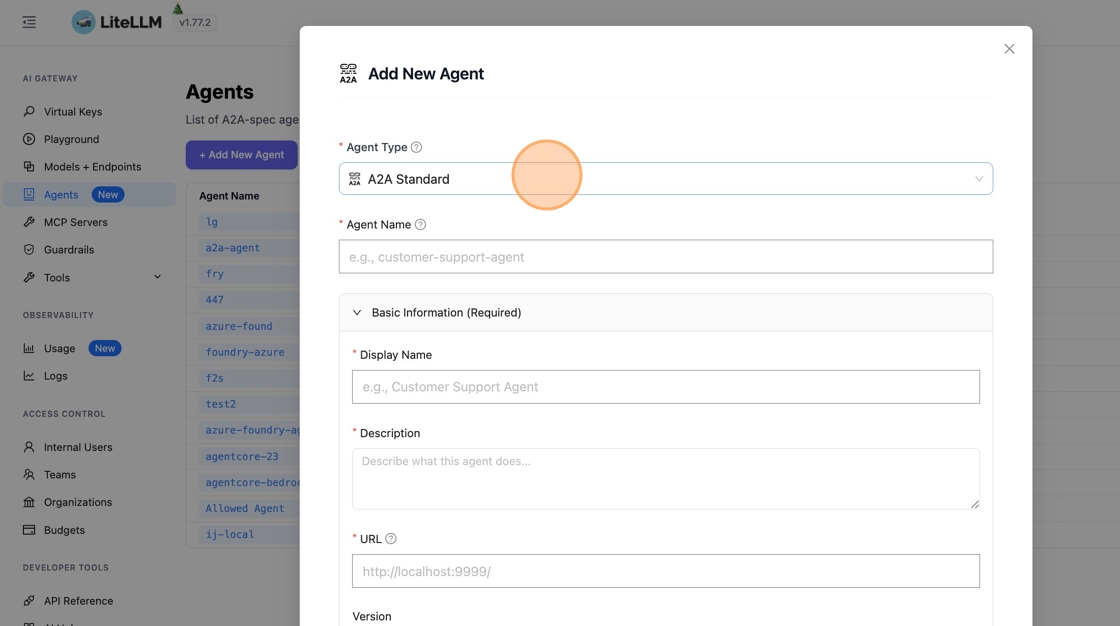
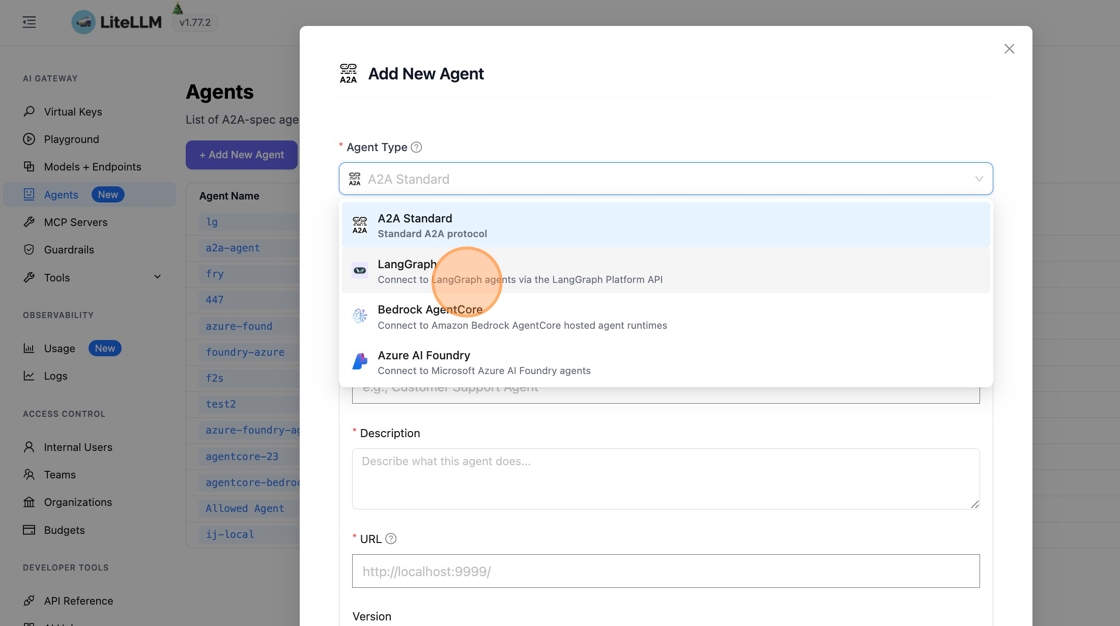
### 2. Select LangGraph Agent Type
Click "A2A Standard" to see available agent types, then search for "langgraph" and select "Connect to LangGraph agents via the LangGraph Platform API".
### 3. Configure the Agent
Fill in the following fields:
- **Agent Name** - A unique identifier (e.g., `lan-agent`)
- **LangGraph API Base** - Your LangGraph server URL, typically `http://127.0.0.1:2024/`
- **API Key** - Optional. LangGraph doesn't require an API key by default
- **Assistant ID** - Not used by LangGraph, you can enter any string here
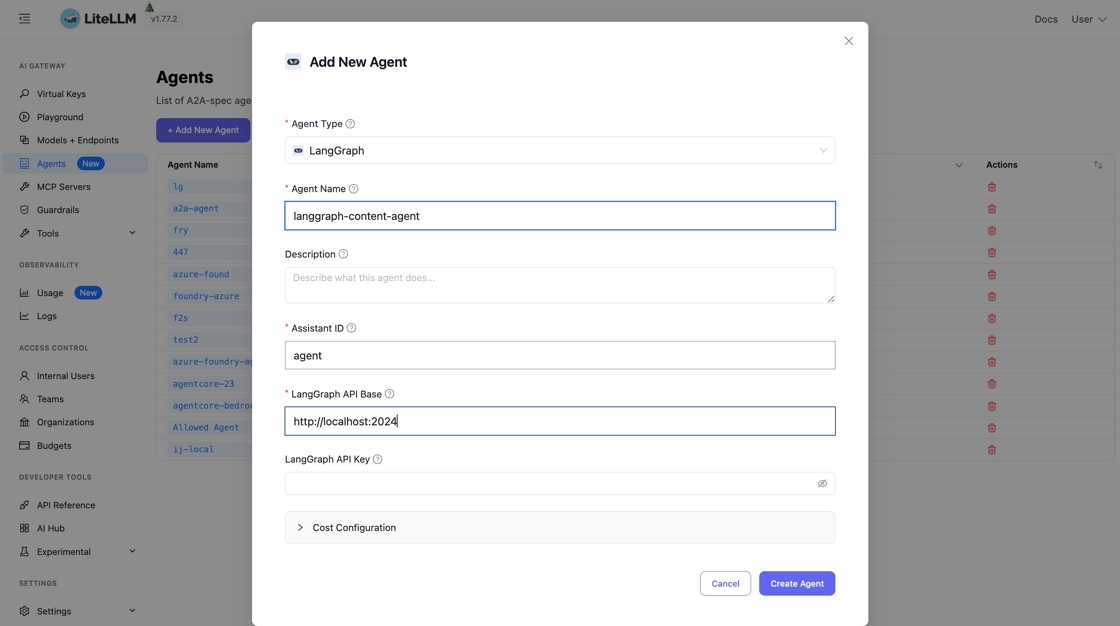
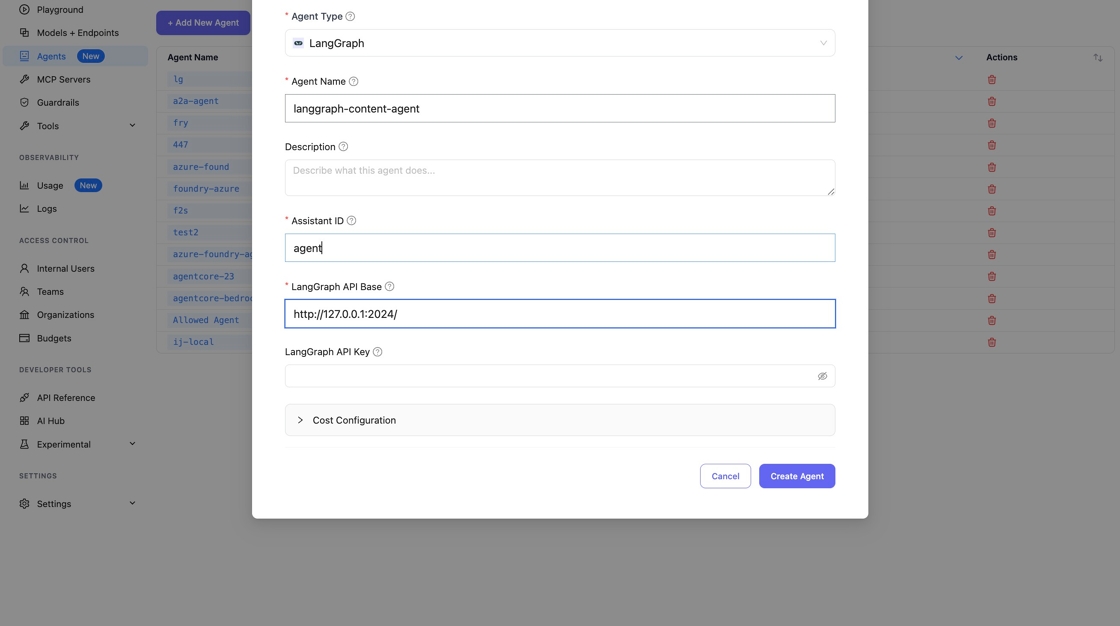
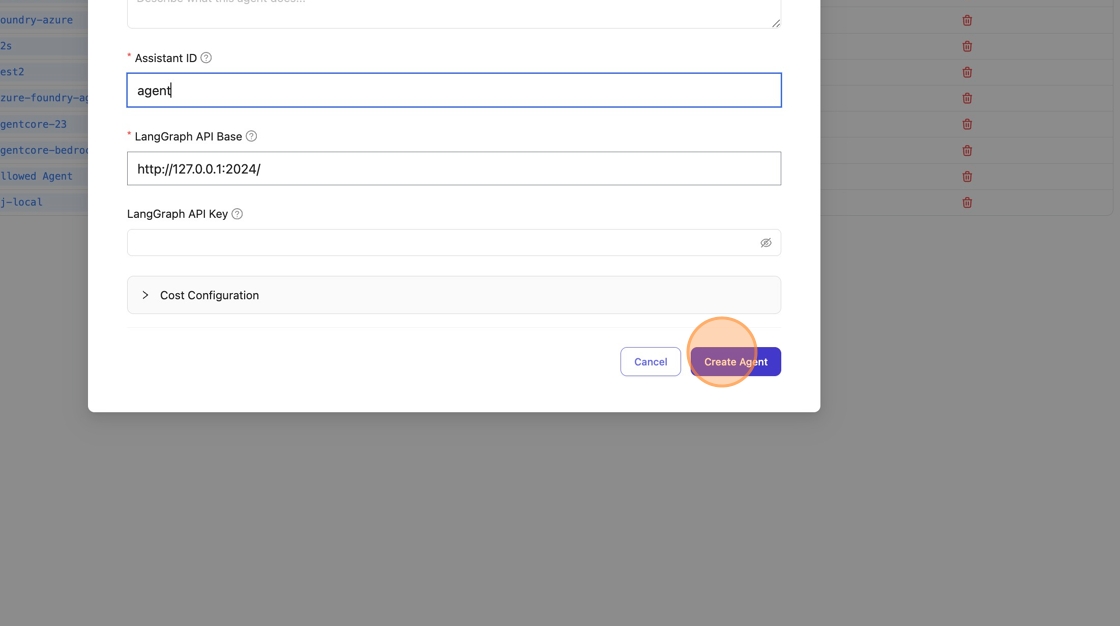
Click "Create Agent" to save.
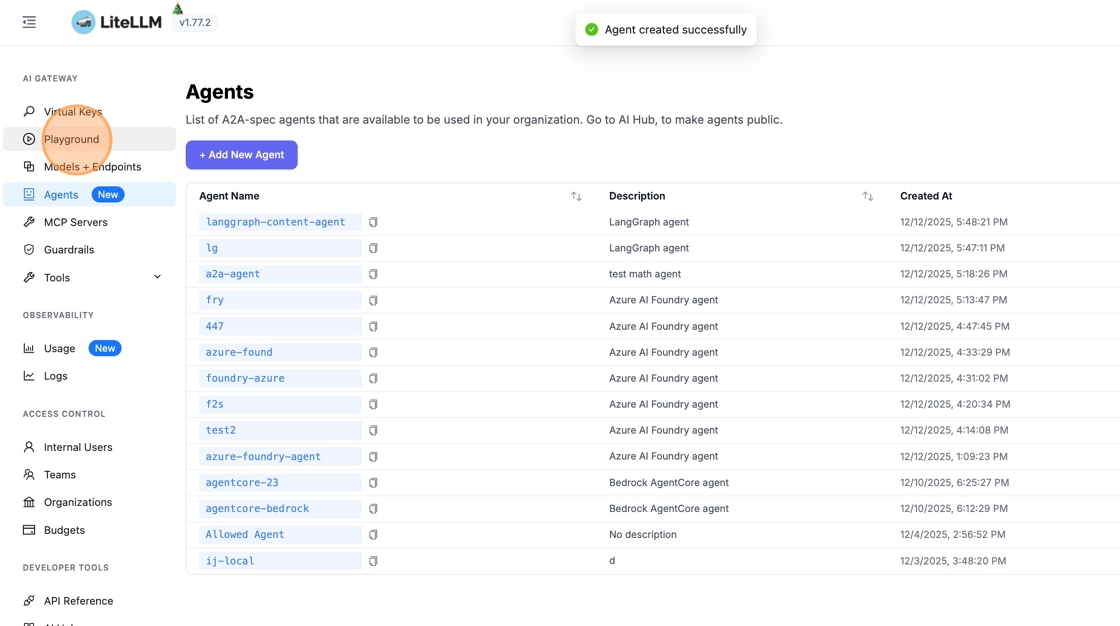
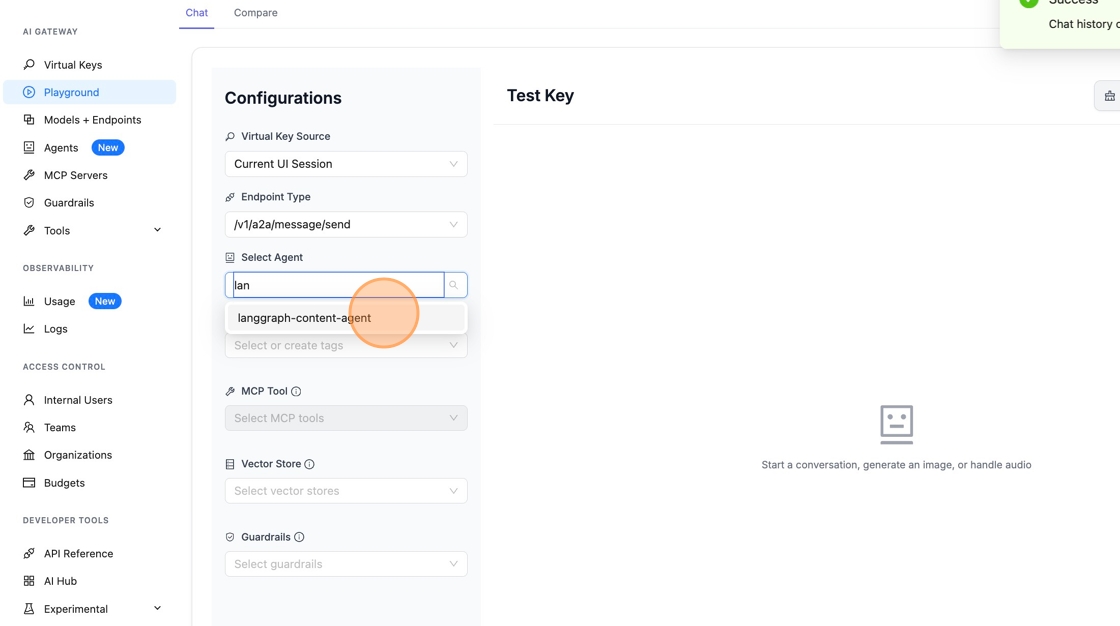
### 4. Test in Playground
Go to "Playground" in the sidebar to test your agent. Change the endpoint type to `/v1/a2a/message/send`.
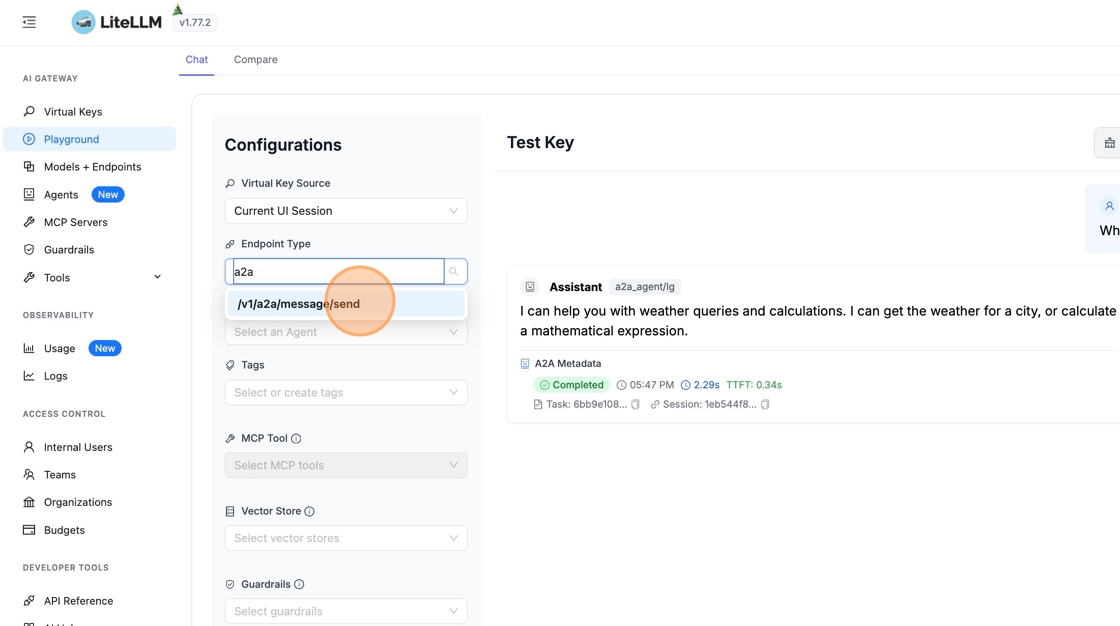
### 5. Select Your Agent and Send a Message
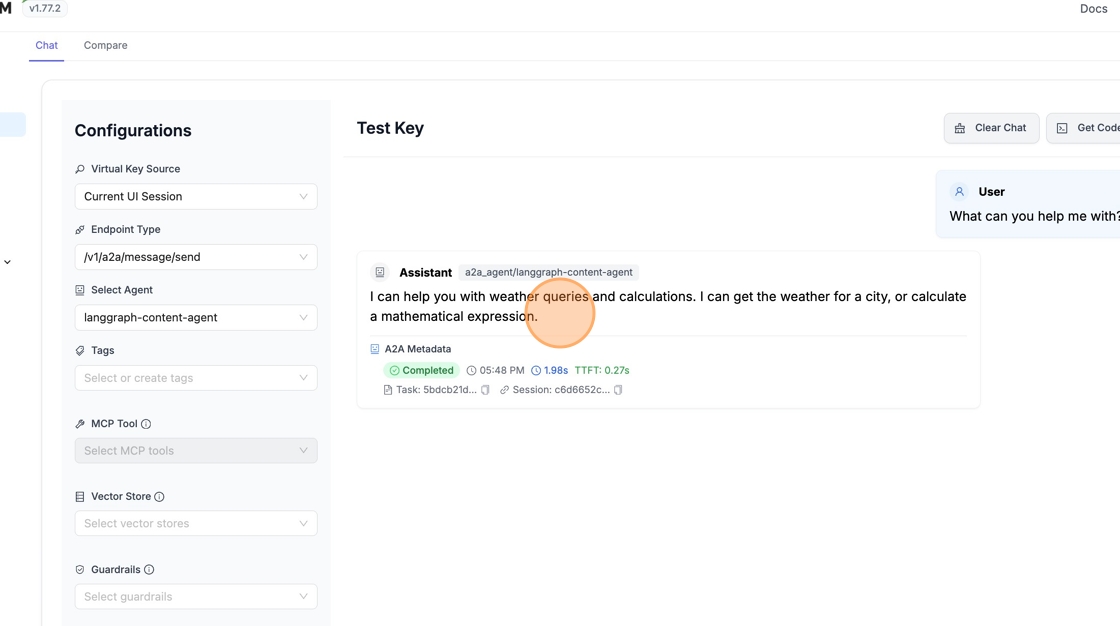
Pick your LangGraph agent from the dropdown and send a test message.
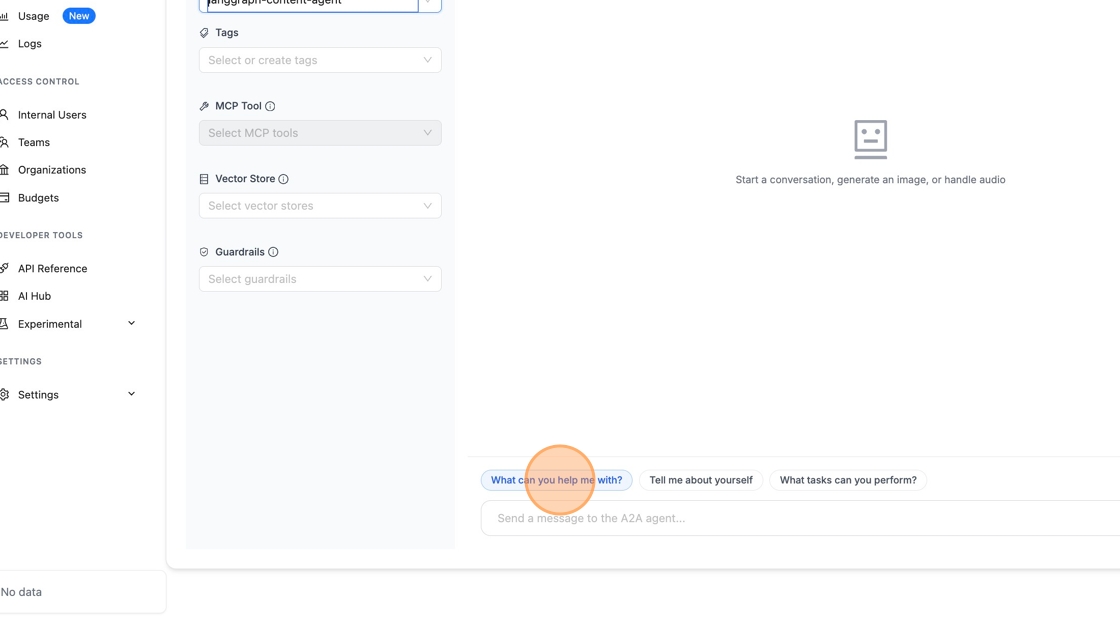
The agent responds with its capabilities. You can now interact with your LangGraph agent through the A2A protocol.
## Further Reading
- [LangGraph Platform Documentation](https://langchain-ai.github.io/langgraph/cloud/quick_start/)
- [LangGraph GitHub](https://github.com/langchain-ai/langgraph)
- [A2A Agent Gateway](../a2a.md)
- [A2A Cost Tracking](../a2a_cost_tracking.md)
---
Source: [Claudary](https://claudary.paisolsolutions.com/skills/langgraph) · https://claudary.paisolsolutions.com